Setting Up Your Home Recording Studio: A Comprehensive Guide (Part 2)
Introduction
Hey everyone, this is Annah Marcelle! In my previous blog post, I shared a comprehensive list of just about everything an independent musical artist would need to set up a home recording studio. The list was personalized specially for me by Gil Kline of Sound Beet Recording. Gil is a talented music producer and audio engineer and we have worked on numerous tracks together, including my upcoming single "I Wasn't You". His knowledge and insights were invaluable to me when I was first starting out.
Now that we’ve got all the equipment we need, it’s time to check back in with Gil and figure out how to get everything set up for optimal results.
Annah: Hi, Gil! Thank you so much for all of your guidance these last few years! Can you tell my readers how to get their equipment set up at home?
Gil: You’re welcome, Annah, and thank you! I’m glad the advice was useful to you! The following steps outline the process of preparing for a vocal recording session:
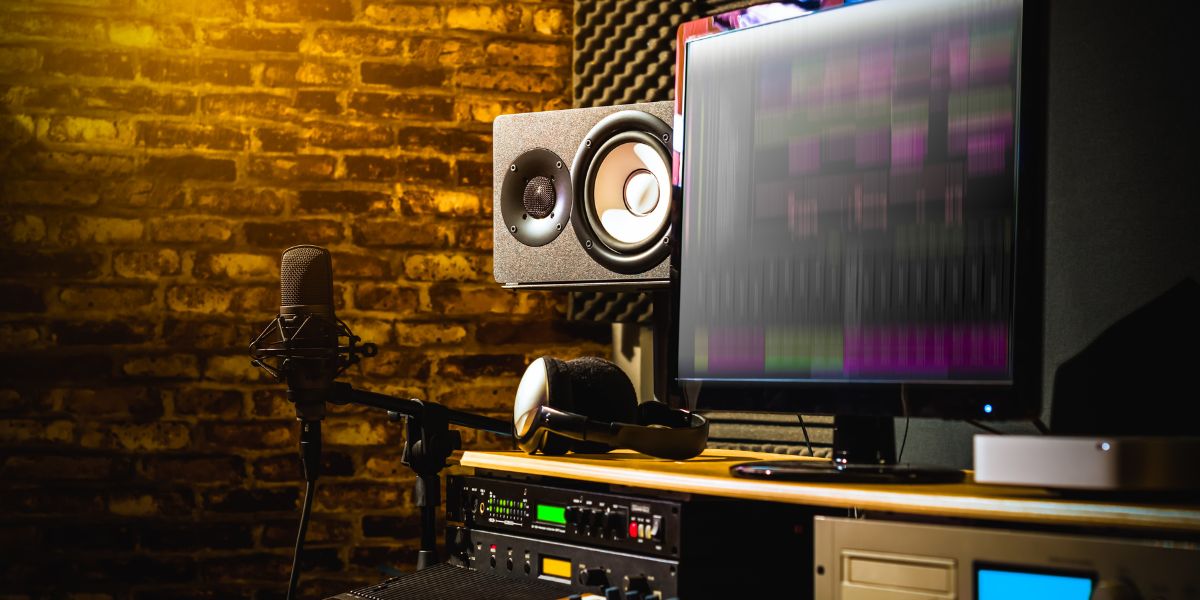
How to Prepare for Your Vocal Recording Session
1. Choose a suitable recording environment.
- Opt for a room that has as little reverb as possible. Reverb is created when sound bounces off of solid surfaces instead of being absorbed. Rooms with a lot of soft furnishings that absorb sound tend to have less reverb.
- Avoid recording in small, enclosed spaces such as closets, bathrooms, and pantries.
- Avoid spaces with thin walls and concrete basements.
- Avoid recording right in front of a wall.
- Do not record outside.
2. Erect tripod microphone stand.
3. Screw microphone shock mount onto microphone stand.
4. Place microphone into shock mount. Look inside the grill of the microphone to identify the diaphragm, which is a small disc that captures sound. If it’s difficult to see, shine a light into the grill of the microphone. Make sure the diaphragm is facing the vocalist directly.
5. Plug in XLR microphone cable by connecting female end into microphone and male end into channel 1 of audio interface.
6. Adjust microphone stand so that the microphone’s diaphragm is slightly above singer’s lips. Doing so will further attenuate any plosives and achieve a more desired timbre. Be sure that the vocalist’s head is level and not tilted slightly down or up.
7. Mount pop shield on the base of the microphone stand roughly 3 - 4 inches below where the shock mount has been screwed in. Take the circular part of the pop shield and place it in front of the microphone’s grill, roughly 2 - 3 inches away.
8. Plug in headphones to your audio interface.
9. On the audio interface, turn on phantom power by pushing in the button which says (+48 Volts). CAUTION: Never unplug your microphone while this button is enabled, as it could damage your microphone. Always turn off the “+48” button before unplugging your condenser microphone.
10. Start with gain knob on the interface all the way down. We will adjust the microphone level (or gain) in an upcoming step.
11. If you have speakers connected your audio interface, make sure the “Monitor” knob is turned all the way down, so that sound only comes through your headphones, not the external speakers. If you do not have external speakers connected to your audio interface, disregard this step.
12. To adjust the volume level in your headphones, adjust the “Headphones” knob.
13. Turn on computer, turn on audio interface (if it has an on/off button), and open recording software.
14. Create a new mono track in recording software.
15. Set the track’s input setting to channel 1 within the recording software.
16. Before singing into the microphone, make sure that your lips are roughly 6 - 9 inches away from the microphone.
17. Set your vocal level by singing as loudly as you plan to sing during your performance. While you are singing, slowly turn up your gain knob for channel one on the audio interface. At the same time, look at the gain meter within your recording software and increase the microphone level on the audio interface. When you are singing at the loudest you plan to sing, the gain meter within the recording software should just barely turn yellow. The track’s gain meter inside your recording software should NEVER show red. If it does this means you are clipping/distorting because the signal is too loud.
18. Check the incoming signal level on your audio interface by singing at the loudest you plan to sing. At the same time, inspect the gain meter on channel one of your audio interface. Your channel’s gain meter should NEVER show red, this means you are clipping/distorting because the signal is too loud.
Annah: Great! That is super helpful, Gil. Thank you! Once everything is all set up, is there any other advice you could share to help things go smoothly?
Gil: Absolutely! Here’s a few tips, rules, and tricks for conducting a successful vocal recording session:
What to Consider During Your Recording Session
1. Have headphones securely around your ears at all times during recording. Removing your headphones from one or both ears can cause the microphone to capture your headphone bleed, thereby adding unwanted noise to your recording. If you are struggling to hear your vocals, turn down the level of each instrument track in your recording software.
2. Make sure to annunciate effectively when singing. For example, words like “Time” can often sound like “Tine” if not pronounced properly during vocal recording.
3. After you have finished singing a vocal part, wait 5 seconds before ending the recording. This will ensure that your recording software does not cut off a particular word or syllable.
4. When recording, make sure you do not hear any excessive hissing, humming or buzzing. Make sure the microphone does not pick up background noises, such as a fan, television, or conversations from other rooms, etc.
5. When recording vocals, you can create a chorus effect by recording the same vocal part multiple times. For best results, engineers like to use the rule of three. Rather than just recording the same vocal part twice, it is better to do so at least three times. If I want a chorus to sound large and impactful, I will sometimes have artists re-record the same vocal part anywhere from 5 - 7 times. You can also use this trick when recording harmonies. Creating multiple instances of lead and harmony tracks can make a chorus sound huge! This process is known as recording “stacks.” When recording vocal parts multiple times, the duplicate recording should be as close to the original as possible in both timing and pitch. To achieve this, be sure to listen to the original through your headphones while recording the duplicate.
IMPORTANT: For this effect, you must record multiple instances of the same part rather than just ”Copying and Pasting” the original vocal recording. The “Copy and Paste” method will not create a chorus effect, rather it will just make the copied vocal part sound louder.
6. When recording background vocals (i.e. harmonies or stacks), sing roughly 4 - 6 feet away from the microphone. This trick helps background vocals to fit nicely in a mix. If recording in a smaller space, 2 - 3 feet of distance is sufficient.
Most of all, be creative and have fun!
Conclusion
In this two-part series, we've embarked on an exciting journey to set up your very own home recording studio. I hope you've found the information to be both informative and invaluable for your musical endeavors.
I'd like to again express my heartfelt gratitude to Gil Kline of Sound Beet Recording for his unwavering support and expert guidance. His insights into setting up a home recording studio have been instrumental, and I'm thrilled to have shared this knowledge with all of you.
We began by exploring the essential equipment needed for your home studio, meticulously curated to meet the needs of independent musical artists. From microphones and audio interfaces to pop shields and headphones, we left no stone unturned.
We then dove into the process of setting up your equipment for optimal recording results. From selecting the right recording environment to configuring your microphone and audio interface, we covered each step to ensure your recording sessions go smoothly. Gil also shared his golden rules for recording success, emphasizing the importance of headphone placement, clear pronunciation, and thoughtful recording practices. These insights will undoubtedly elevate your vocal recordings to new heights.
Lastly, we delved into the creative aspects of recording, discussing techniques like vocal stacking to achieve that larger-than-life chorus effect. Remember, creativity knows no bounds, so don't be afraid to experiment and have fun along the way!
As you embark on your home recording journey, keep these lessons close to heart. Whether you're a seasoned artist or just starting, building your home recording studio is a step toward greater musical independence and creativity.
Thank you for joining me on this adventure, and I look forward to hearing your music fill the airwaves.
Keep singing, keep creating, and most importantly, keep rocking!
Annah Marcelle, Singer-Songwriter, Performing Artist
Annah Marcelle is an aspiring musical artist with more than twenty original songs on digital streaming platforms. She has been writing and recording music since the age of 16 and has worked closely with several up-and-coming music producers.
Previous Posts
Midnights: Taylor Swift’s Musical Cry For Help
February 25, 2026
Taking the Last Flight with Lainey Dionne
April 14, 2025
Get to Know Mikaela Ayira: Top 20 Finalist on The Voice
February 20, 2025
Haley Bundy: From Small-Town Ohio to Nashville's Music Scene | An Exclusive Interview
August 28, 2024
An Interview with Scarlet Tantrum: From Shy Beginnings to Emotional Powerhouse
June 24, 2024
Introducing Katie Klein: A New Voice in Indie Music and Songwriting
June 13, 2024
Julia Golden: Rising Singer-Songwriter from North Carolina
May 28, 2024
Discovering Clare Cunningham: An Inspiring Journey of Music, Faith, and Mental Health Advocacy
May 23, 2024
Karra Rhodes: A Rising Star in Country-Pop Music and Songwriting
May 22, 2024
Life on Mars - Taking Off with Singer/Songwriter Annah Marcelle
April 25, 2024
Setting Up Your Home Recording Studio: A Comprehensive Guide (Part 2)
December 23, 2023
Essential Equipment for Your Home Recording Studio: A Comprehensive Guide
November 9, 2023
Featured Videos
Annah Marcelle - Running in Circles (Lyrics)
Roxette - Listen to Your Heart (Annah Marcelle Cover)
Annah Marcelle - Love a Liar (Official Audio)
Radiohead - Creep (Annah Marcelle Cover)
Taylor Swift - Ours (Annah Marcelle Cover)